We all know the WordPress drill. Need to tweak your admin panel? There’s a plugin for that. Want to optimize your images? Another one. Sorting pages, duplicating content, sharing on social media – the list of essential-but-separate plugins goes on and on. It can feel like your website is held together by a fragile ecosystem of single-purpose tools.
But what if you could ditch the plugin clutter and achieve all those crucial customizations with a single, powerful plugin? Imagine streamlining your WordPress backend with a tool that tackles everything from admin tweaks to content management and beyond.
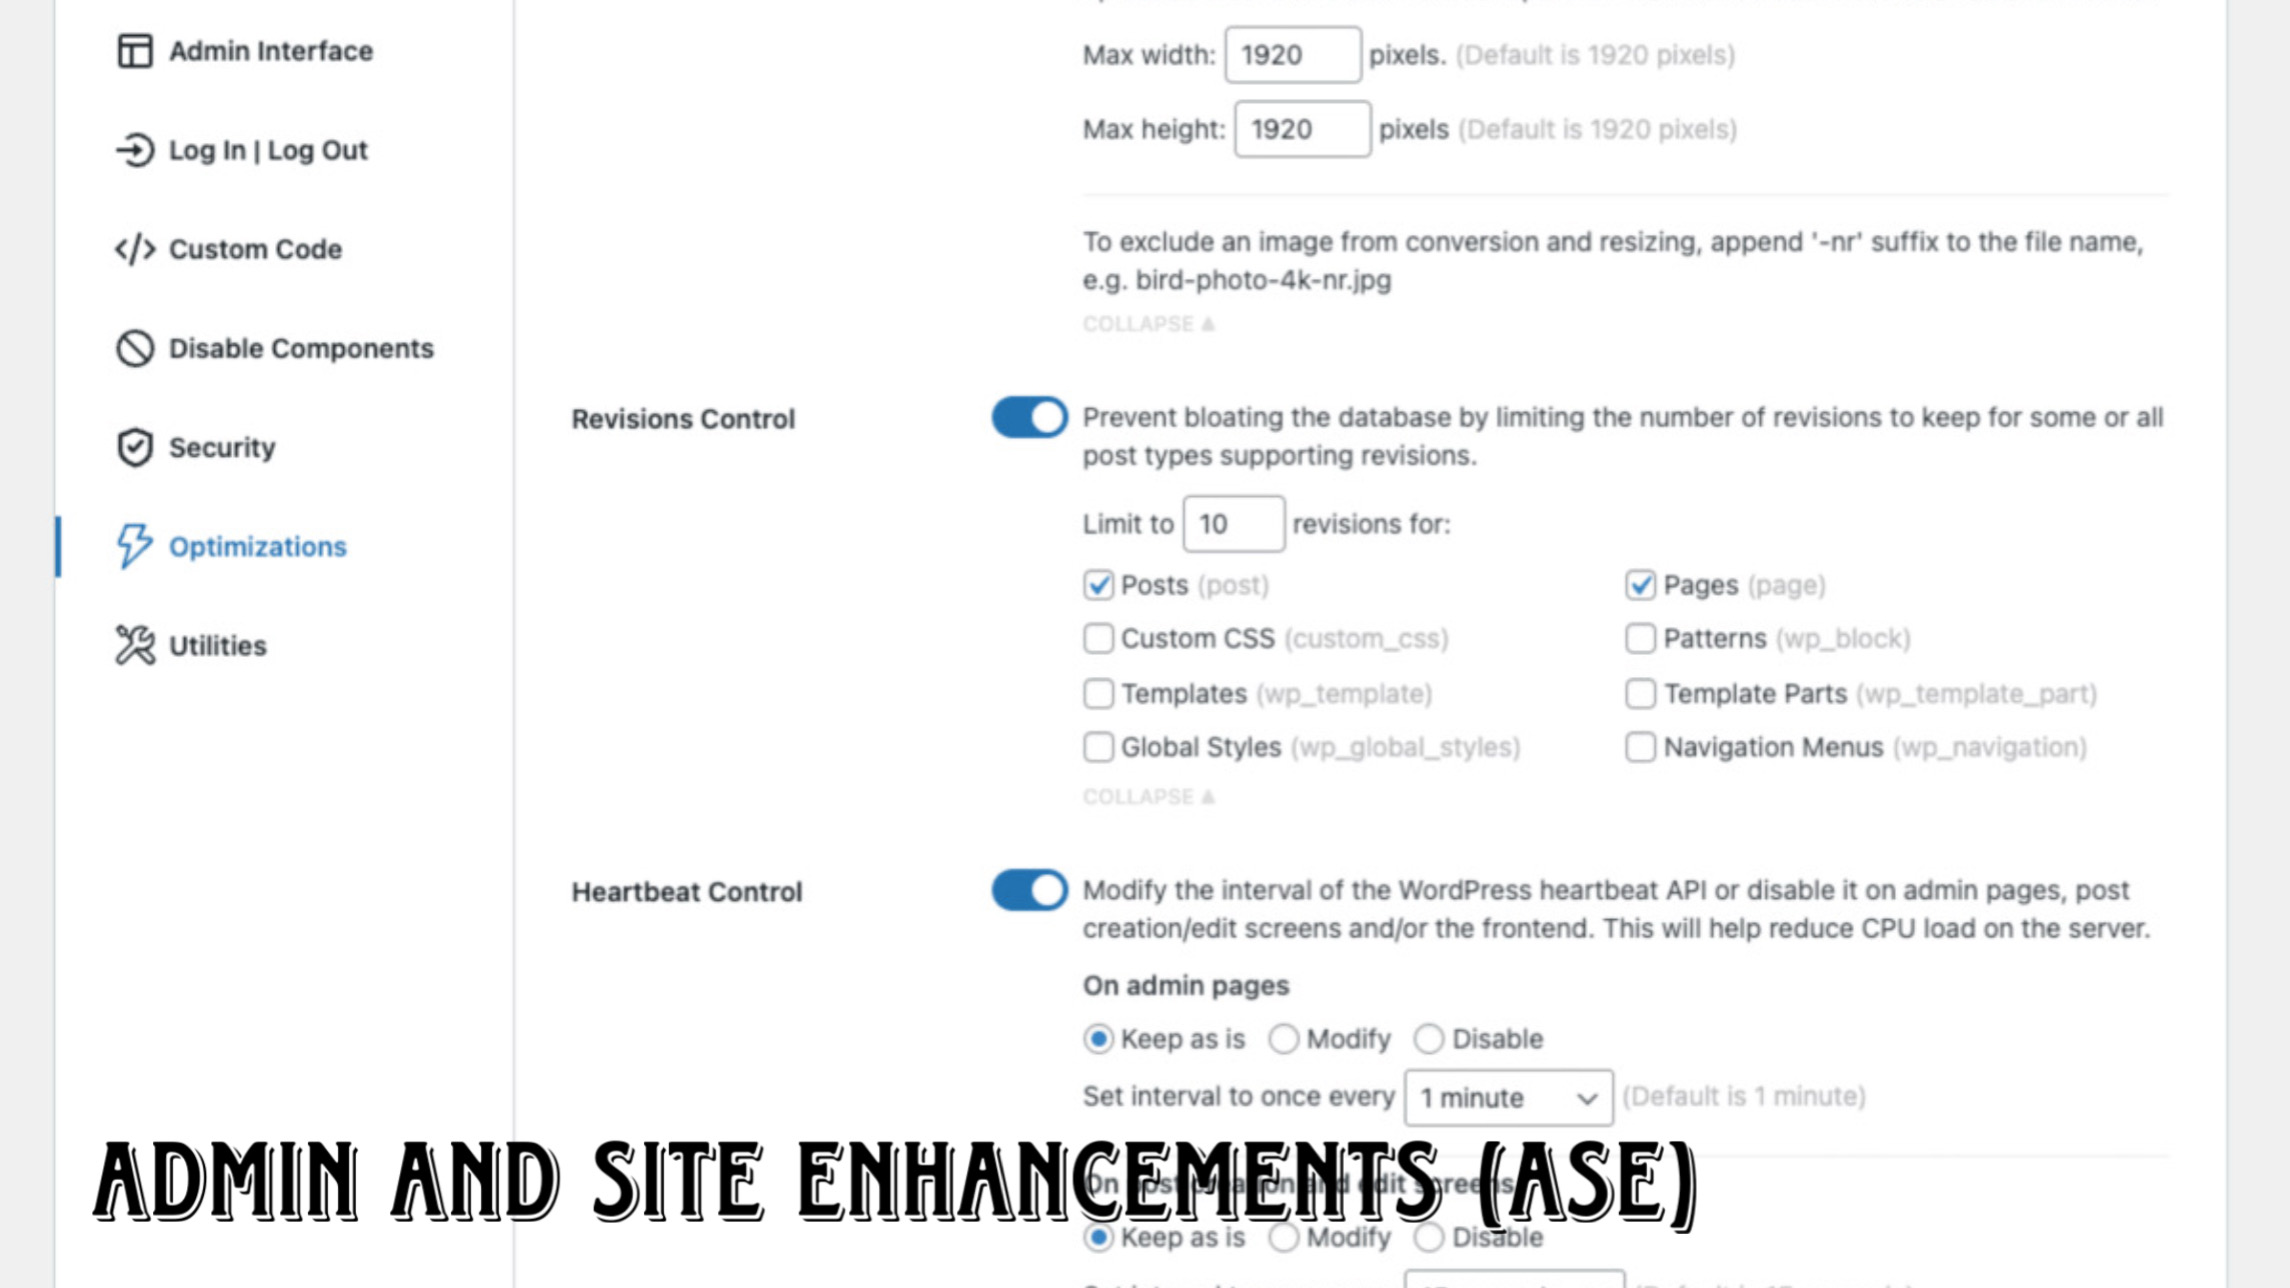
In this post, we’re diving deep into such a plugin – ASE: Admin and Site Enhancement. As the name suggests, this gem focuses on supercharging your WordPress admin experience and even touches on front-end functionalities. Forget juggling dozens of plugins for minor adjustments; ASE aims to consolidate those features into one efficient package.
We’ll walk you through the installation, initial setup, and showcase 8 to 10 of its most impressive features. The best part? We’ll be exploring the free version, proving that you don’t always need to break the bank for enhanced website control.
Ready to declutter your plugin list and unlock a more streamlined WordPress experience? Let’s get started!
(Insert engaging image or GIF of a cluttered plugin list transforming into a clean one)
Installing Your New WordPress Command Center: ASE
First things first, you need to bring ASE into your WordPress world. Here’s how:
- Head to Your WordPress Backend: Log in to your WordPress admin panel – the familiar yourwebsite.com/wp-admin.
- Navigate to Plugins: In the left-hand sidebar, hover over “Plugins” and click “Add New.”
- Search for ASE: In the search bar, type “Admin and Site Enhancement.”
- Install the Right One: Look for the plugin titled “Admin and Site Enhancements” by WPChillies. It should have over 100,000 active installations and a strong five-star rating. Click “Install Now.”
- Activate the Plugin: Once the installation is complete, click the “Activate” button.
Exploring the ASE Dashboard: Your Central Hub
With ASE activated, you’ll find its dedicated dashboard, your new go-to spot for a multitude of website enhancements. To access it:
- Hover over “Tools”: In your WordPress admin sidebar, find the “Tools” menu.
- Click “Enhancements”: A submenu item called “Enhancements” will appear. Click on it to access the ASE dashboard.
Here, you’ll see a well-organized array of features, neatly categorized to help you navigate its extensive capabilities. We’ll now delve into some of the most impactful features within these categories.
Supercharging Your Content Management
ASE kicks things off with powerful tools to streamline how you handle your website’s core – its content.
1. Effortless Content Duplication
Ever needed to create a new post or page based on an existing one? Instead of tedious copy-pasting, ASE introduces a simple “Duplicate” option directly in your post and page lists.
How it Works: Enable “Content Duplication” in the ASE settings under “Content Management.” You can choose whether the duplicated content opens in the edit screen or stays in the list view.
The Benefit: Save significant time and effort when creating similar content, whether it’s product pages, event listings, or recurring blog post formats.
2. Master Your Content Order
The default chronological order of posts and pages can sometimes be inconvenient. ASE’s “Content Order” feature lets you drag and drop your content into your preferred sequence.
How it Works: Enable “Content Order” and a new “Order” submenu will appear. Drag and drop your posts and pages to arrange them as needed.
The Benefit: Showcase your most important content first, easily organize portfolio items, or maintain a specific flow for your website’s structure.
3. Painless Media Replacement
Mistakes happen. You upload the wrong image or need to update an existing one across your entire site. ASE’s “Media Replacement” feature simplifies this process.
How it Works: Enable “Media Replacement.” Then, in your Media Library, edit the image you want to replace and you’ll find an option to “Select New Media File.”
The Benefit: Update images seamlessly without breaking links or having to manually replace them in every single post or page.
Refining Your Admin Interface for Maximum Efficiency
A clean and customized admin panel can significantly improve your workflow. ASE offers several options to tailor your backend experience.
4. Declutter Your Admin Bar
That top WordPress admin bar can sometimes feel a bit overwhelming. ASE lets you selectively remove elements you don’t frequently use.
How it Works: Under “Admin Interface,” in the “Clean Up Admin Bar” section, you can choose to remove the WordPress logo and menu, the home icon and site name, and more.
The Benefit: A cleaner admin bar means less visual noise and quicker access to the tools you actually need.
5. Organize Your Admin Menu
Tired of scrolling through a long list of admin menu items? ASE’s “Admin Menu Organizer” lets you rearrange, rename, and even hide menu items to create a more personalized and efficient backend.
How it Works: Enable “Admin Menu Organizer.” A new “Admin Menu” option will appear under “Settings.” Here, you can drag and drop menu items, rename them for clarity (e.g., “LightSpeed Cache” to just “Cache”), and hide less frequently used sections. You can even group items under a toggle for an ultra-clean look.
The Benefit: A streamlined admin menu means faster navigation and less time wasted searching for specific settings.
Enhancing User Experience and Security
ASE doesn’t just focus on the backend; it also offers features to improve your site’s front-end and security.
6. Custom Login/Logout Links in Your Menu
Want to make it easier for users to log in and out? ASE lets you add dedicated login and logout links directly to your website’s navigation menus.
How it Works: Enable “Login/Logout” under “Login & Register.” Then, in your WordPress menu editor (Appearance > Menus), you’ll find new “Login” and “Logout” options to add to your desired menu.
The Benefit: Improved user experience by providing readily accessible login and logout options.
7. Basic Login Attempt Limitation
Protect your website from brute-force attacks with ASE’s basic login attempt limitation.
How it Works: In the “Security” section, enable “Limit Login Attempts” and configure the maximum number of allowed login attempts and the lockout duration.
The Benefit: Enhanced security by preventing malicious users from repeatedly trying to guess passwords.
8. Automatic Redirection for 404 Errors
Instead of displaying a standard “Page Not Found” error, ASE can automatically redirect users to your homepage when they encounter a 404 error.
How it Works: Enable “Redirect 404 to Homepage” under “Utilities.”
The Benefit: Improved user experience and potentially better SEO by keeping users on your site instead of hitting a dead end.
The Beauty of One: Lightweight Efficiency
One of the most significant advantages of ASE is its lightweight nature. By consolidating the functionality of numerous plugins into a single, well-coded tool, you can potentially reduce plugin bloat and contribute to a faster loading website. This is a win-win for both your site’s performance and your sanity.